Moroccan Delights: Cooking a Flavorful Chicken Tagine

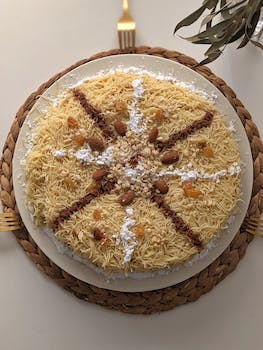
Hey there foodies! I’ve been on a mission to explore different cuisines lately and I stumbled upon a little gem called Moroccan cuisine. Moroccan food is full of flavor and spices that leave your taste buds singing with joy, and one of my favorite dishes is the chicken tagine.

A tagine is a type of clay pot used in Moroccan cooking. The dish is named after the pot and is used to slow cook meat, vegetables, and spices. The result is a deliciously tender and flavorful meal that will transport you to the vibrant streets of Morocco.

For my chicken tagine, I started by marinating the chicken in a mixture of cumin, paprika, ginger, and turmeric. I let it sit for about an hour to soak up all the delicious spices. Then, I chopped up onions, garlic, and carrots and sautéed them in olive oil until they were soft and fragrant.
Moroccan cuisine
Photo by Soùfari Rabàh

Next, I added the marinated chicken to the pot and let it cook for a few minutes until it was browned on all sides. I then added in some chicken broth, chopped tomatoes, and a handful of dried apricots. I covered the pot, lowered the heat, and let it simmer for about an hour.

The result was a mouth-watering chicken tagine that was bursting with flavor. The spices and the sweetness from the apricots worked perfectly together and the chicken was so tender it practically fell off the bone.

I served my chicken tagine with some fluffy couscous and a side of roasted vegetables. It was the perfect meal for a cozy night in with friends or family.

If you’re looking for a new and exciting dish to try, I highly recommend giving chicken tagine a go. It’s a delicious and comforting meal that will leave you feeling satisfied and happy. Plus, it’s a great way to explore the flavors and spices of Moroccan cuisine.

Until next time foodies, happy cooking!

A Taste of Greece: Your Guide to Making Mouthwatering Moussaka

Hey there foodies! As a lover of all things Greek cuisine, I am excited to share with you my guide to making mouthwatering moussaka. This classic Greek dish is a layered casserole featuring eggplant, spiced meat, and a creamy bechamel sauce. It’s a hearty and satisfying meal that will transport your taste buds straight to the Mediterranean.

First things first, you’ll need to gather your ingredients. For the meat filling, you’ll need ground beef or lamb, onion, garlic, tomato sauce, cinnamon, and nutmeg. As for the eggplant, you’ll want to slice it into thin rounds and sprinkle with salt to remove any bitterness. You’ll also need potatoes, olive oil, and breadcrumbs. For the bechamel sauce, you’ll need butter, flour, milk, eggs, and grated nutmeg.

Once you have all your ingredients prepped and ready to go, it’s time to start cooking. Begin by frying the potatoes in olive oil until they are golden brown. Then, brown the meat in a separate pan with the onions and garlic. Add the tomato sauce and spices, and let it simmer until the sauce has thickened.

Next, it’s time to assemble the moussaka. Start by layering the fried potatoes in the bottom of a baking dish. Then, add a layer of the salted eggplant rounds. Top the eggplant with the meat mixture, and then repeat the layers until you’ve used up all your ingredients. Sprinkle the top with breadcrumbs and drizzle with olive oil.

Now, it’s time to make the bechamel sauce. Melt the butter in a saucepan, then whisk in the flour until it forms a paste. Slowly add the milk, whisking constantly to prevent lumps from forming. Once the sauce has thickened, remove it from the heat and let it cool for a few minutes. Beat the eggs in a separate bowl and then add them to the sauce along with the grated nutmeg.

Pour the bechamel sauce over the top of the moussaka, making sure to spread it evenly. Bake the moussaka in a preheated oven at 375 degrees Fahrenheit for about an hour, or until the top is golden brown and the filling is cooked through.

Once your moussaka is done, let it cool for a few minutes before slicing and serving. This dish is best enjoyed with a side of Greek salad and a glass of red wine. Trust me, your taste buds will thank you.

I hope this guide has inspired you to try your hand at making moussaka. It’s a bit of work, but the end result is well worth it. So, grab your apron and get cooking! Opa!

Protein-Packed Delight: Quinoa Stuffed Bell Peppers Recipe

Hey guys! Today I’m going to share with you one of my favorite recipes that is not only delicious but also packed with protein. It’s my Quinoa Stuffed Bell Peppers recipe.

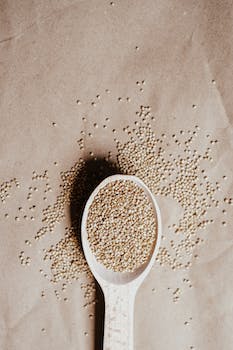
Bell peppers are high in vitamin C, antioxidants and fiber. Quinoa, on the other hand, is packed with protein, fiber and essential amino acids. So, this recipe is a perfect combination of health and taste.

Ingredients

Quinoa
Photo by Vie Studio

  • 4 medium-sized bell peppers, cut in half and de-seeded
  • 1 cup cooked quinoa
  • 1 can black beans, drained and rinsed
  • 1/2 cup corn
  • 1/2 cup diced onion
  • 1/2 cup diced tomato
  • 1/2 cup shredded cheddar cheese
  • 1 tsp cumin
  • 1 tsp chili powder
  • 1 tsp garlic powder
  • 1/4 tsp cayenne pepper
  • Salt and pepper to taste

Instructions

  1. Preheat your oven to 375°F.
  2. In a large mixing bowl, combine the cooked quinoa, black beans, corn, onion, tomato, shredded cheese, cumin, chili powder, garlic powder, cayenne pepper, salt and pepper to taste. Mix well.
  3. Stuff each bell pepper half with the quinoa mixture. Place the stuffed bell peppers in a baking dish.
  4. Cover the baking dish with foil and bake for 35-40 minutes.
  5. Remove the foil and bake for an additional 5-10 minutes or until the cheese is melted and bubbly.
  6. Serve hot and enjoy!

This recipe is perfect for a quick and easy dinner or a meal prep option for the week. It’s also a great way to sneak some veggies and protein into your diet without sacrificing taste.

If you want to change things up, you can also try using different colored bell peppers or adding some diced jalapeños for an extra kick of heat.

Give this recipe a try and let me know what you think in the comments below!

A Taste of India: Step-by-Step Guide to Chicken Tikka Masala

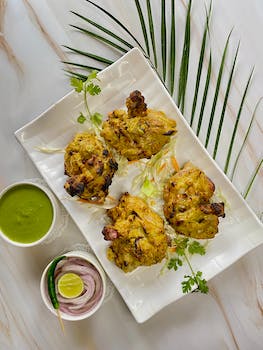
Hey there foodies! Today, I’m sharing my favorite recipe for a classic Indian dish – Chicken Tikka Masala. This delicious and creamy dish is perfect for a cozy night in or to impress your guests at a dinner party. Follow along with my step-by-step guide and I promise you won’t be disappointed.

Ingredients:

– 1 lb boneless, skinless chicken breast, cut into bite-sized pieces
– 1 cup plain Greek yogurt

Chicken Tikka Masala
Photo by Pixie Pannier


– 2 tbsp lemon juice
– 2 tsp ground cumin
– 2 tsp paprika
– 1 tsp ground cinnamon
– 1 tsp salt
– 1 tsp freshly ground black pepper
– 2 tbsp unsalted butter
– 1 large onion, diced
– 4 garlic cloves, minced
– 2 tbsp grated fresh ginger
– 2 tsp ground coriander
– 1 tsp ground cumin
– 1 tsp paprika
– 1 tsp garam masala
– 1 can (14.5 oz) crushed tomatoes
– 1 cup heavy cream
– Fresh cilantro, chopped, for garnish
– Cooked basmati rice, for serving

Instructions:

1. In a large bowl, combine the chicken, yogurt, lemon juice, cumin, paprika, cinnamon, salt, and pepper. Mix well and allow to marinate in the fridge for at least 30 minutes, or up to 12 hours.

2. Preheat a grill or grill pan to high heat. Thread the chicken onto skewers and grill for 5-7 minutes per side, or until cooked through. Remove from the grill and set aside.

3. In a large skillet, melt the butter over medium heat. Add the onion and cook until softened, about 5 minutes. Add the garlic and ginger and cook for another 2 minutes. Add the coriander, cumin, paprika, and garam masala and cook for 1-2 minutes, until fragrant.

4. Add the crushed tomatoes and bring the mixture to a simmer. Cook for 10-15 minutes, until the sauce has thickened slightly.

5. Add the grilled chicken to the skillet and stir to coat in the sauce. Add the heavy cream and stir to combine. Simmer for another 5 minutes, until the sauce has thickened and the chicken is heated through.

6. Serve the chicken tikka masala over cooked basmati rice and garnish with fresh cilantro.

There you have it – a delicious and authentic recipe for chicken tikka masala. It may take a little bit of effort, but trust me, it’s totally worth it. Happy cooking!

Lemon Bars Recipe: Tart and Sweet

Hey there, fellow foodies! Today, I’m going to share with you my favorite recipe for lemon bars. These bars are the perfect combination of tart and sweet, and they make for a delicious dessert or snack.

Ingredients

  • 1 cup all-purpose flour
  • 1/2 cup unsalted butter, softened
  • 1/4 cup powdered sugar
  • 2 eggs
  • 1 cup granulated sugar
  • 1/4 cup fresh lemon juice
  • 1/2 teaspoon baking powder
  • 1/4 teaspoon salt
  • Additional powdered sugar for dusting

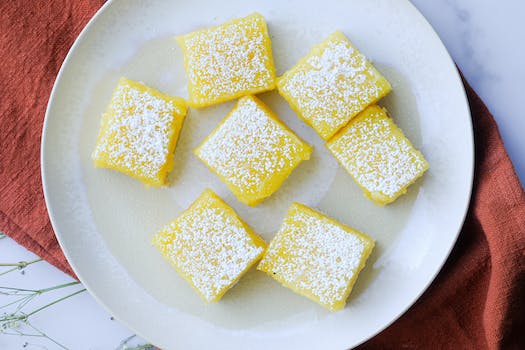
Lemon bars
Photo by Canto Photography

Instructions

  1. Preheat your oven to 350°F (175°C).
  2. In a medium bowl, mix together the flour, butter, and powdered sugar until a dough forms.
  3. Press the dough into an 8-inch square baking pan and bake for 15-20 minutes, or until lightly golden brown.
  4. While the crust is baking, whisk together the eggs, granulated sugar, lemon juice, baking powder, and salt until well combined.
  5. Pour the mixture over the hot crust and bake for an additional 20-25 minutes, or until the filling is set and lightly golden around the edges.
  6. Let the bars cool completely before dusting with powdered sugar and slicing into squares.
  7. Enjoy!

These lemon bars are so easy to make and they always turn out perfectly. I love how the tangy lemon flavor balances out the sweetness of the sugar. They’re a great dessert option for any occasion, whether you’re hosting a dinner party or just want a sweet treat after dinner.

If you’re a fan of lemon desserts like me, then you definitely need to give these lemon bars a try. I promise you won’t be disappointed!

This post may contain affiliate links, where I may receive a small commission if you purchase something through following the link at no cost to you.

Homemade Cinnamon Rolls Recipe: Perfect for Breakfast

Hey guys! I’m so excited to share with you my recipe for homemade cinnamon rolls. This recipe is perfect for breakfast or even as a sweet treat for any time of day. The best part is, you can make them from scratch and they’re super easy to make!

Ingredients:

  • 2 cups of flour
  • 1/4 cup of sugar
  • 1/2 tsp of salt
  • 1/4 cup of butter, softened
  • 1/4 cup of warm water
  • 1 egg
  • 1 tbsp of yeast
  • 1/2 cup of brown sugar
  • 1 tbsp of cinnamon
  • 1/4 cup of butter, melted

homemade
Photo by Pixabay

Instructions:

  1. In a mixing bowl, combine the flour, sugar, and salt.
  2. Add in the softened butter, warm water, egg, and yeast. Mix until a dough forms.
  3. Knead the dough on a floured surface for about 5 minutes.
  4. Place the dough in a greased bowl, cover with a cloth, and let it rise for 30 minutes.
  5. In a separate bowl, mix together the brown sugar and cinnamon.
  6. Roll out the dough on a floured surface into a rectangle shape.
  7. Brush melted butter over the dough.
  8. Sprinkle the cinnamon-sugar mixture over the dough.
  9. Roll up the dough tightly and cut into 1-inch slices.
  10. Place the slices in a greased baking dish and let them rise for another 30 minutes.
  11. Bake at 350°F for 20-25 minutes, or until golden brown.
  12. Let cool for a few minutes before serving.

Final Thoughts:

Trust me, these cinnamon rolls are so delicious and worth the effort. They’re perfect for breakfast or as a sweet treat. You can even make them ahead of time and store them in the freezer. Just pop them in the microwave or oven to reheat and enjoy! Let me know how they turn out for you!

Homemade Brownies Recipe: Fudgy and Delicious

Hey there, fellow bakers! Today, I want to share with you my go-to recipe for homemade brownies that are not only fudgy but also incredibly delicious. I’ve been making these brownies for years, and they never fail to impress.

To start, preheat your oven to 350°F (175°C) and line a 9×13 inch baking pan with parchment paper. This will make it easier to remove the brownies from the pan once they’re done.

Now, let’s get to the ingredients. You’ll need:

– 1 cup unsalted butter
– 2 1/4 cups granulated sugar
– 4 large eggs
– 1 1/4 cups cocoa powder
– 1 teaspoon salt
– 1 teaspoon baking powder
– 1 teaspoon espresso powder (optional)
– 1 tablespoon vanilla extract
– 1 1/2 cups all-purpose flour
– 2 cups semi-sweet chocolate chips

Brownies
Photo by Marta Dzedyshko

In a medium-sized saucepan, melt the butter over low heat. Once melted, remove from heat and stir in the sugar. Add the eggs, one at a time, stirring well after each addition. Next, add the cocoa powder, salt, baking powder, espresso powder (if using), and vanilla extract. Mix until well combined.

Add the flour and chocolate chips to the mixture and stir until just combined. Be careful not to overmix, as this will result in tough brownies.

Pour the batter into the prepared baking pan and smooth the top with a spatula. Bake for 30-35 minutes or until a toothpick inserted in the center comes out clean. Let the brownies cool completely in the pan before removing them and cutting into squares.

And there you have it, my homemade brownies recipe that’s fudgy and delicious. These brownies are perfect for any occasion, whether it’s a birthday party or a simple afternoon snack. I hope you give this recipe a try and enjoy it as much as I do!

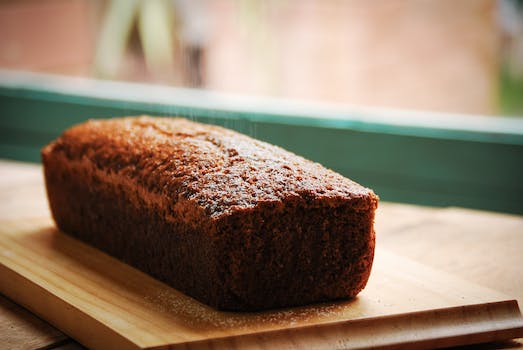
Homemade Banana Bread Recipe: Moist and Delicious

Hey there, fellow bakers! I’m excited to share with you my favorite recipe for homemade banana bread. It’s moist, delicious, and super easy to make.

Let’s get started!

Ingredients:

  • 3 ripe bananas
  • 1/3 cup melted butter
  • 1 teaspoon baking soda
  • Pinch of salt
  • 3/4 cup sugar
  • 1 large egg, beaten
  • 1 teaspoon vanilla extract
  • 1 1/2 cups all-purpose flour

Homemade Banana Bread Recipe
Photo by Mimi Moromisato

Instructions:

  1. Preheat your oven to 350°F (175°C).
  2. Mash the ripe bananas with a fork in a bowl until smooth.
  3. Stir in the melted butter.
  4. Add the baking soda and salt. Stir.
  5. Mix in the sugar, beaten egg, and vanilla extract.
  6. Add the flour and mix until just combined.
  7. Pour the batter into a greased 4×8 inch loaf pan.
  8. Bake for 50-60 minutes, or until a toothpick inserted into the center comes out clean.
  9. Let the banana bread cool in the pan for at least 15 minutes before removing it and slicing.

That’s it! Your homemade banana bread is ready to serve. I love to enjoy it warm with a little bit of butter on top. It’s also great for breakfast or as a snack.

Give this recipe a try and let me know what you think in the comments below. Happy baking!

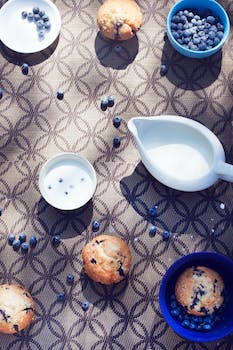
Easy Blueberry Muffins Recipe: Soft and Fluffy

Hey guys! Today, I want to share with you my easy blueberry muffins recipe. I am not a professional baker, but this recipe never fails me. The muffins always turn out soft and fluffy, and my family loves them.

Ingredients:

  • 2 cups all-purpose flour
  • 1 tablespoon baking powder
  • 1/2 teaspoon salt
  • 1/2 cup unsalted butter, softened
  • 1 cup granulated sugar
  • 2 large eggs
  • 1/2 cup milk
  • 1 teaspoon vanilla extract
  • 1 1/2 cups fresh blueberries

Instructions:

  1. Preheat your oven to 375°F (190°C). Line a muffin tin with muffin cups or grease it with cooking spray.
  2. In a medium bowl, whisk together the flour, baking powder, and salt. Set aside.
  3. In a large bowl, cream together the butter and sugar until light and fluffy.
  4. Add the eggs, one at a time, beating well after each addition.
  5. Stir in the milk and vanilla extract.
  6. Add the dry ingredients to the wet ingredients, and mix until just combined.
  7. Gently fold in the blueberries.
  8. Scoop the batter into the prepared muffin cups, filling each cup about 3/4 full.
  9. Bake for 20 to 25 minutes, or until a toothpick inserted into the center of a muffin comes out clean.
  10. Let the muffins cool in the pan for a few minutes before transferring them to a wire rack to cool completely.

That’s it! Your easy blueberry muffins are ready to enjoy. You can serve them warm or at room temperature. They are perfect for breakfast, brunch, or as a snack. You can also store them in an airtight container at room temperature for up to 3 days.

Blueberry muffins
Photo by Deeana Arts

Tips:

  • You can use frozen blueberries instead of fresh ones, but do not thaw them before adding them to the batter.
  • If you do not have muffin cups, you can use a greased muffin tin. However, the muffins may stick to the tin, so be careful when removing them.
  • You can add a streusel topping to the muffins for extra texture and flavor. Mix together 1/4 cup all-purpose flour, 1/4 cup granulated sugar, and 2 tablespoons unsalted butter, until crumbly. Sprinkle the streusel over the muffin batter before baking.

I hope you enjoyed this easy blueberry muffins recipe. Let me know in the comments if you tried it and how it turned out. If you have any other tips or variations, feel free to share them as well. Happy baking!

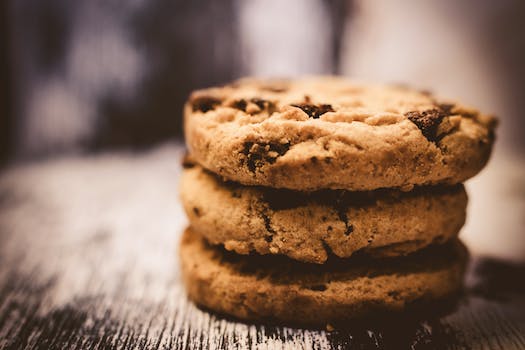
Classic Chocolate Chip Cookie Recipe

Hey guys!

Today, I want to share with you my favorite chocolate chip cookie recipe. It’s a classic recipe that never fails to satisfy my sweet tooth.

Ingredients:

    chocolate chip cookie
    Photo by Lisa Fotios

  • 2 1/4 cups all-purpose flour
  • 1 tsp baking soda
  • 1 tsp salt
  • 1 cup unsalted butter, softened
  • 3/4 cup white sugar
  • 3/4 cup brown sugar
  • 2 large eggs
  • 2 tsp vanilla extract
  • 2 cups semisweet chocolate chips

Directions:

  1. Preheat your oven to 375°F (190°C).
  2. In a small bowl, mix together the flour, baking soda, and salt.
  3. In a large bowl, cream the butter, white sugar, and brown sugar until smooth.
  4. Add the eggs and vanilla extract to the butter mixture and mix well.
  5. Gradually add the flour mixture to the butter mixture and mix until just blended.
  6. Stir in the chocolate chips.
  7. Drop the cookie dough by rounded tablespoons onto ungreased baking sheets.
  8. Bake for 10-12 minutes or until golden brown.
  9. Cool on wire racks.

And that’s it! This recipe makes about 36 cookies, so you’ll have plenty to share (or not).

One thing I love about this recipe is how versatile it is. You can switch up the chocolate chips for white chocolate chips, peanut butter chips, or even add some chopped nuts. The possibilities are endless.

So, go ahead and give this classic chocolate chip cookie recipe a try. Your taste buds will thank you!