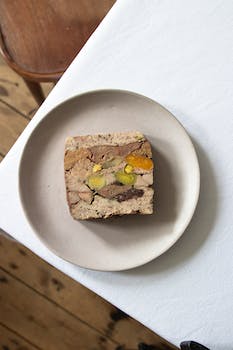
Ultimate Mac and Cheese: A Creamy Delight for Comfort Cravings

Hey there foodies! Today, I want to talk about one of my all-time favorite comfort foods: Ultimate Mac and Cheese. Who doesn’t love a hot, gooey bowl of mac and cheese on a chilly day? It’s the perfect combination of cheesy, creamy, and savory that just hits all the right spots.

Now, let’s talk about what makes the Ultimate Mac and Cheese so special. First of all, it’s all about the cheese. You want to use a blend of cheeses that will melt well and create that perfect cheesy sauce. I like to use a combination of sharp cheddar, Gouda, and Parmesan. The sharp cheddar adds a tangy flavor, the Gouda adds a smoky depth of flavor, and the Parmesan adds a nutty bite.

Next, it’s important to use a good quality pasta. I prefer using elbow macaroni, but you can also use shells, fusilli, or any other pasta shape that will hold onto the sauce. You want to cook the pasta until it’s al dente, which means it still has a bit of bite to it. This will ensure that the pasta doesn’t turn mushy when you mix it with the sauce.

Mac and Cheese
Photo by Ronmar Lacamiento


Now, let’s talk about the sauce. The key to a good mac and cheese sauce is to make a roux, which is a mixture of butter and flour that helps thicken the sauce. You want to cook the roux until it’s golden brown, then slowly whisk in some warm milk. This will create a creamy base for your cheese sauce.

Once you’ve added the milk, it’s time to add the cheese. You want to gradually add the cheese to the sauce, stirring constantly until it’s fully melted and the sauce is smooth and creamy. Then, you can add some mustard, Worcestershire sauce, hot sauce, or any other seasonings you like to give your Ultimate Mac and Cheese some extra flavor.

Finally, it’s time to mix the pasta with the sauce and bake it until it’s golden brown and bubbly. I like to sprinkle some breadcrumbs on top for some extra crunch, but that’s totally optional.

In conclusion, if you’re looking for a delicious and comforting meal that will satisfy all your cravings, look no further than Ultimate Mac and Cheese. With its creamy, cheesy goodness, it’s the perfect dish to warm you up on a chilly day. So go ahead and indulge – you deserve it!

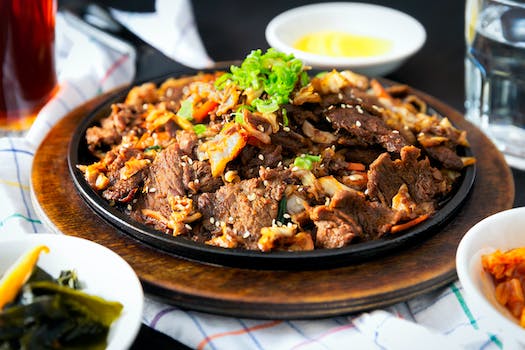
Hearty Beef Stew: A Warm and Satisfying Classic

Hey there, foodies! Today, I’m going to talk about one of my all-time favorite winter dishes: hearty beef stew. There’s nothing quite like a warm bowl of stew on a chilly day, and this classic recipe never fails to hit the spot.

The Ingredients

Before we get started, let’s talk about what you’ll need to make this delicious stew:

Beef stew
Photo by SenuScape

  • 2 pounds of beef chuck, cut into 1-inch pieces
  • 3 tablespoons of olive oil
  • 1 large onion, diced
  • 4 cloves of garlic, minced
  • 3 large carrots, peeled and sliced into 1/4-inch rounds
  • 3 stalks of celery, sliced into 1/4-inch pieces
  • 2 tablespoons of tomato paste
  • 1 cup of red wine
  • 4 cups of beef broth
  • 1 bay leaf
  • 1 teaspoon of dried thyme
  • 1 pound of potatoes, peeled and cut into 1-inch pieces
  • Salt and pepper to taste

The Steps

Now that we have our ingredients, let’s get cooking:

  1. Heat the olive oil in a large pot over medium-high heat.
  2. Add the beef and cook until browned on all sides, about 5-7 minutes.
  3. Remove the beef from the pot and set it aside.
  4. Add the onion, garlic, carrots, and celery to the pot and cook until the vegetables are softened, about 5-7 minutes.
  5. Add the tomato paste and cook for another 1-2 minutes.
  6. Return the beef to the pot and add the red wine, beef broth, bay leaf, and thyme. Bring the mixture to a boil, then reduce the heat and simmer for 1 hour.
  7. Add the potatoes to the pot and continue simmering until the potatoes are tender and the meat is cooked through, about 30-45 minutes.
  8. Remove the bay leaf and season with salt and pepper to taste.

The Result

And that’s it! You now have a delicious pot of hearty beef stew ready to be enjoyed. This recipe is perfect for a cozy night in or for feeding a crowd. Serve it with some crusty bread or over a bed of rice for a complete meal. Trust me, you won’t be disappointed.

So next time you’re in the mood for something warm and satisfying, give this classic dish a try. Your taste buds will thank you!

Crispy Fried Chicken: Finger-Licking Goodness at Home

Hey there, foodies! I don’t know about you, but fried chicken is one of my all-time favorite comfort foods. And let’s face it, we all love a good crispy fried chicken. But have you ever tried making it at home? Trust me, it’s easier than you think, and the results are finger-licking good!

Ingredients:

  • 8-10 pieces of chicken (I prefer using thighs and drumsticks)
  • 1 cup all-purpose flour
  • fried chicken
    Photo by Pixabay

  • 1 tablespoon garlic powder
  • 1 tablespoon onion powder
  • 1 tablespoon paprika
  • 1 tablespoon salt
  • 1 teaspoon black pepper
  • 1 cup buttermilk
  • Oil for frying (vegetable, canola, or peanut oil)

Instructions:

  1. Mix together the flour, garlic powder, onion powder, paprika, salt, and black pepper in a bowl.
  2. Place the buttermilk in a separate bowl.
  3. Take each piece of chicken and dip it in the buttermilk, making sure it’s completely coated.
  4. Dredge the chicken in the flour mixture, pressing the flour onto the chicken to ensure it sticks.
  5. Heat the oil in a large skillet or pot to 350°F.
  6. Carefully place the chicken in the hot oil, making sure not to overcrowd the pan. Fry for about 10-12 minutes per side, or until the chicken is golden brown and cooked through.
  7. Once the chicken is cooked, remove it from the oil and place it on a wire rack to cool.
  8. Serve and enjoy!

And that’s it! This recipe is so easy, and the end result is crispy, juicy fried chicken that’s sure to be a hit with your family and friends. You can serve it with your favorite dipping sauces, or even make it into a sandwich.

So next time you’re craving some crispy fried chicken, why not try making it at home? Trust me, you won’t regret it!

Homestyle Meatloaf: A Nostalgic Dish with a Twist

I don’t know about you, but homestyle meatloaf always takes me back to my childhood. My mom used to make it for us on chilly evenings, and the smell of it baking in the oven would fill the whole house. It’s a classic American dish that’s been around for generations, and for good reason. It’s hearty, comforting, and can feed a crowd. But just because it’s a classic doesn’t mean it can’t be improved upon.

That’s why I decided to put my own twist on this nostalgic dish. Instead of using ground beef, I opted for a combination of ground turkey and pork. Not only is this a healthier option, but it also adds a bit more flavor to the meatloaf. I also added some diced onions and bell peppers to the mix for some extra texture and flavor.

But the real star of the show is the glaze. Instead of the typical ketchup-based glaze, I went with a sweet and tangy barbecue sauce. It’s the perfect complement to the savory meatloaf and adds a nice caramelized crust to the top.

homestyle meatloaf
Photo by Geraud pfeiffer


To make my homestyle meatloaf, I start by preheating the oven to 350 degrees Fahrenheit. In a large bowl, I mix together one pound of ground turkey, one pound of ground pork, one diced onion, one diced bell pepper, one cup of breadcrumbs, two eggs, and a tablespoon each of Worcestershire sauce, salt, and pepper. I then form the mixture into a loaf and place it in a greased baking dish.

Next, I make the glaze by mixing together half a cup of barbecue sauce, two tablespoons of brown sugar, and a tablespoon of apple cider vinegar. I pour the glaze over the top of the meatloaf and use a brush to spread it evenly.

I bake the meatloaf for about an hour, or until the internal temperature reaches 165 degrees Fahrenheit. I let it rest for a few minutes before slicing and serving.

The result is a delicious and satisfying twist on a classic dish. It’s still just as comforting and nostalgic as the original, but with a little something extra. Try making this homestyle meatloaf for your next family dinner and see how everyone reacts. I guarantee it’ll be a hit!

Creamy Tomato Soup: A Cozy Bowl of Comfort

There’s nothing quite like a warm bowl of creamy tomato soup on a chilly day. It’s like a big, cozy hug in a bowl. This classic comfort food is beloved by many, and for good reason. It’s simple, delicious, and oh-so-satisfying.

I love making creamy tomato soup from scratch. It’s surprisingly easy and so much tastier than the canned stuff. Plus, you can customize it to your liking. Want it extra creamy? Add more cream. Want it spicy? Add some red pepper flakes. The possibilities are endless.

Here’s my go-to recipe for creamy tomato soup:

Creamy tomato soup
Photo by cottonbro studio

Ingredients:

  • 1 tablespoon olive oil
  • 1 onion, chopped
  • 2 cloves garlic, minced
  • 2 cans of whole peeled tomatoes
  • 2 cups chicken or vegetable broth
  • 1/2 cup heavy cream
  • Salt and pepper, to taste

Instructions:

  1. Heat the olive oil in a large pot over medium heat. Add the onion and garlic and cook until softened, about 5 minutes.
  2. Add the canned tomatoes and their juices to the pot. Use a wooden spoon to break up the tomatoes into smaller pieces.
  3. Pour in the broth and bring the soup to a simmer. Cook for about 20 minutes.
  4. Remove the soup from the heat and let it cool slightly. Use an immersion blender (or transfer the soup to a blender) to puree the soup until smooth.
  5. Stir in the heavy cream and season with salt and pepper to taste.
  6. Serve hot with some crusty bread for dipping.

See? It’s so easy! And the result is a rich, velvety soup that will warm you up from the inside out. Plus, it’s packed with vitamins and antioxidants from the tomatoes.

So next time you’re in need of some comfort food, try making a batch of creamy tomato soup. It’s the perfect way to cozy up on a chilly day.

Classic Chicken Pot Pie: A Flaky Crust and Savory Filling

Hey there, foodies! Today, I’m going to talk to you about one of my all-time favorite comfort foods: Classic Chicken Pot Pie. There’s nothing quite like the smell of a freshly baked pot pie, with its flaky golden crust and savory filling. It’s the perfect meal for a cold winter night or a rainy day.

Now, I’ll be honest, making a chicken pot pie from scratch can be a bit time-consuming. But trust me when I say it’s worth the effort. There’s nothing quite like the satisfaction of cutting into a homemade pot pie and seeing all the delicious filling spilling out.

Let’s start with the crust. A good pot pie crust should be flaky and buttery, with just the right amount of crunch. I like to use a simple recipe that combines flour, salt, butter, and ice water. You’ll want to make sure the butter is cold when you start, so it doesn’t melt too quickly and ruin the texture of the crust. I usually chill my dough in the fridge for at least 30 minutes before rolling it out and placing it in my pie dish.

Chicken Pot Pie
Photo by Klaus Nielsen

Now, on to the filling. For a classic chicken pot pie, you’ll need chicken (duh), vegetables, and a creamy sauce. I like to use a mix of carrots, peas, and potatoes, but you can really use any vegetables you like. The key is to make sure they’re cooked through before you add them to the pie, so they don’t end up undercooked or mushy in the final product.

For the sauce, I start by making a roux with butter and flour, then whisk in chicken broth and milk to create a creamy base. I add in some herbs and spices to give it a little extra flavor, then mix in the cooked chicken and vegetables. Once everything is combined, I pour the mixture into my crust and top it off with another layer of dough.

Then it’s off to the oven! I usually bake my pot pie for about 45 minutes at 375 degrees Fahrenheit, until the crust is golden brown and the filling is bubbling. It’s important to let the pie cool for a few minutes before cutting into it, so the filling has a chance to set.

And there you have it, folks. Classic Chicken Pot Pie: a flaky crust and savory filling that’s sure to warm you up on a chilly day. Give it a try and let me know what you think!

Baked Macaroni and Cheese: A Cheesy Delight

Hey there, fellow foodies!

Today, I want to talk about one of my all-time favorite comfort foods: baked macaroni and cheese. There is something about the gooey, cheesy goodness of this dish that just warms my heart and soul.

Now, I know there are a million different ways to make mac and cheese, but I want to share my personal favorite recipe with you all.

Macaroni and cheese
Photo by Ronmar Lacamiento

Ingredients:

  • 1 pound elbow macaroni
  • 4 tablespoons butter
  • 1/4 cup all-purpose flour
  • 2 cups whole milk
  • 2 cups shredded cheddar cheese
  • 1 cup shredded mozzarella cheese
  • 1/2 cup breadcrumbs
  • Salt and pepper to taste

Instructions:

  1. Preheat your oven to 375 degrees F.
  2. Cook the macaroni according to package instructions, then drain and set aside.
  3. In a large saucepan, melt the butter over medium heat.
  4. Add the flour and whisk until smooth.
  5. Slowly add the milk, whisking constantly, until the mixture is smooth and creamy.
  6. Add the cheddar and mozzarella cheeses, stirring until they are melted and the sauce is smooth.
  7. Season the sauce with salt and pepper to taste.
  8. Combine the cooked macaroni with the cheese sauce, stirring until everything is well combined.
  9. Pour the mac and cheese into a 9×13 inch baking dish.
  10. Sprinkle the breadcrumbs evenly over the top of the mac and cheese.
  11. Bake for 25-30 minutes, or until the breadcrumbs are golden brown and the cheese is bubbly.
  12. Let the mac and cheese cool for a few minutes before serving.

And there you have it, folks! The perfect baked macaroni and cheese. This dish is great for a cozy night in, a family dinner, or even a potluck. It’s always a crowd-pleaser!

So go ahead, give this recipe a try and let me know what you think. And if you have any other favorite mac and cheese recipes, feel free to share them in the comments below.

Until next time, happy cooking!

Beef Chili: Spicy and Hearty for Chilly Days

Hey there, foodies! Today I’m going to talk about one of my all-time favorite comfort foods – beef chili. There’s something about a big bowl of spicy, hearty chili that just warms me up from the inside out, especially on chilly days.

What Makes Beef Chili So Great?

For starters, beef chili is incredibly versatile. You can make it as spicy or mild as you like, and you can add all sorts of different ingredients to make it your own. Some people like to add beans, corn, or even sweet potatoes to their chili for extra flavor and texture.

Beef chili
Photo by Chitokan C.

Another great thing about beef chili is that it’s super filling. A big bowl of chili can keep you satisfied for hours, which makes it a great choice for lunch or dinner on a cold day. Plus, it’s packed with protein, which is essential for keeping your energy levels up throughout the day.

My Favorite Beef Chili Recipe

Now, I’m no chef, but I do have a go-to beef chili recipe that I absolutely love. Here’s what you’ll need:

  • 1 pound ground beef
  • 1 chopped onion
  • 2 chopped garlic cloves
  • 1 can diced tomatoes
  • 1 can tomato sauce
  • 1 can kidney beans
  • 1 tablespoon chili powder
  • 1 teaspoon cumin
  • Salt and pepper to taste

To make the chili, simply brown the ground beef and onions in a large pot. Add the garlic and cook for another minute or two. Then, add the diced tomatoes, tomato sauce, kidney beans, and spices. Stir everything together and let it simmer for at least 30 minutes (the longer you let it simmer, the more flavorful it will be).

That’s it! Serve your chili with some shredded cheese, sour cream, and a side of cornbread for the ultimate comfort food experience.

Final Thoughts

Overall, I think beef chili is one of the best foods out there, especially when the weather gets chilly. It’s spicy, hearty, and packed with flavor – what more could you want? If you’ve never tried making your own chili before, I highly recommend giving it a try. You might just find that it becomes a staple in your cold-weather meal rotation.

Southern Fried Catfish: Crispy Goodness from the Deep South

Hey y’all!

I don’t know about you, but when I think of classic Southern cuisine, one dish that always comes to mind is Southern Fried Catfish. There’s just something about that crispy outer layer and tender, flaky fish inside that makes my mouth water every time.

Growing up in the South, catfish was a staple in our household. My dad would go fishing in the nearby lakes and come home with a bucket full of catfish. As a kid, I wasn’t too fond of the taste, but as I got older, I developed a taste for it and now it’s one of my favorite Southern dishes.

Southern cuisine
Photo by Ali Dashti


So, what makes Southern Fried Catfish so special? Well, first off, it’s all in the batter. To get that perfect crispy coating, Southerners typically use a mixture of cornmeal and flour, seasoned with a blend of spices like paprika, garlic powder, and cayenne pepper. The fish is then fried in hot oil until golden brown and crispy.

But the key to making great Southern Fried Catfish is in the preparation. Many Southerners swear by soaking the fish in buttermilk before coating it in the batter. This not only helps to tenderize the fish but also adds a tangy flavor that pairs perfectly with the crispy batter.

When it comes to serving Southern Fried Catfish, there are a variety of options. Some people like to serve it on a bed of creamy coleslaw, while others prefer it with a side of hushpuppies and fries. And of course, no Southern meal is complete without a tall glass of sweet tea.

If you’ve never tried Southern Fried Catfish before, I highly recommend giving it a try. It’s a classic Southern dish that’s sure to please any seafood lover. And if you’re feeling adventurous, why not try making it yourself at home? It’s not too difficult to make and will impress your friends and family at your next Southern-style feast.

So, there you have it – Southern Fried Catfish, a crispy and delicious dish that’s perfect for any occasion. I’m already drooling just thinking about it. Y’all enjoy!

Shepherd’s Pie: Layers of Meat, Veggies, and Creamy Mash

Hey guys, I recently tried making Shepherd’s Pie for the first time and I have to say, it was a hit! This dish is the perfect comfort food – layers of meat, veggies, and creamy mashed potatoes. Here’s how I made it.

Ingredients:

  • 1 pound ground beef
  • 1 onion, chopped
  • Shepherd
    Photo by Valeria Boltneva

  • 2 cloves garlic, minced
  • 1 cup frozen peas and carrots
  • 1 cup beef broth
  • 1 tablespoon Worcestershire sauce
  • 1 teaspoon dried thyme
  • 4 cups mashed potatoes
  • 1/2 cup shredded cheddar cheese

Instructions:

  1. Preheat your oven to 375°F (190°C).
  2. In a large skillet, cook the ground beef until browned. Drain any excess fat.
  3. Add the chopped onion and minced garlic to the skillet and cook until softened, about 5 minutes.
  4. Add the frozen peas and carrots, beef broth, Worcestershire sauce, and dried thyme to the skillet. Stir everything together and let it cook for a few minutes until the veggies are tender.
  5. Spoon the beef mixture into a 9×13 inch baking dish.
  6. Spoon the mashed potatoes on top of the beef mixture and spread it out evenly.
  7. Sprinkle the shredded cheddar cheese on top of the mashed potatoes.
  8. Bake the Shepherd’s Pie for 25-30 minutes, or until the cheese is melted and bubbly.

That’s it! This recipe was super easy to make and it tasted amazing. The combination of savory beef, sweet veggies, and creamy mashed potatoes is unbeatable. Plus, it’s a great way to sneak in some extra veggies for picky eaters.

If you’re feeling adventurous, you can also try swapping out the ground beef for ground lamb. This will give your Shepherd’s Pie a more traditional flavor. Or, you can add in some extra veggies like mushrooms or corn to mix things up.

Overall, I highly recommend giving Shepherd’s Pie a try. It’s a hearty and delicious meal that the whole family will love!