Homemade Chicken Noodle Soup: A Soul-Soothing Bowl

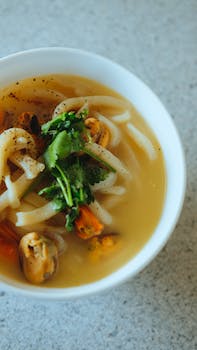
Hey there, foodies! Today I want to talk about one of my favorite comfort foods – homemade chicken noodle soup. There’s nothing quite like a warm bowl of soup on a chilly day, and chicken noodle soup has always been my go-to. Not only is it delicious, but it’s also easy to make and incredibly soothing for the soul.

First things first, let’s talk about the ingredients. You’ll need:

  • 1 whole chicken
  • Chicken noodle soup
    Photo by Nguyen Phuong NGUYEN

  • 1 onion, chopped
  • 3 carrots, peeled and chopped
  • 3 stalks of celery, chopped
  • 2 cloves of garlic, minced
  • 8 cups of chicken broth
  • 1 bay leaf
  • 1 tablespoon of fresh thyme leaves
  • Salt and pepper to taste
  • 8 oz of egg noodles

Start by cooking the chicken in a large pot of water until it’s fully cooked. Remove the chicken from the pot and let it cool. Once it’s cool enough to handle, remove the meat from the bones and set it aside. Discard the bones and skin.

In the same pot, sauté the onion, carrots, celery, and garlic until they’re softened. Add the chicken broth, bay leaf, thyme, salt, and pepper. Bring it to a boil, then reduce the heat and let it simmer for about 20 minutes.

Add the egg noodles to the pot and cook until they’re tender. Add the chicken back in and cook for another 5-10 minutes until everything is heated through.

And that’s it! Homemade chicken noodle soup in just a few simple steps. Not only is it delicious, but it’s also incredibly comforting. There’s something about a warm bowl of soup that just makes everything better.

If you’re feeling adventurous, you can also add in some other ingredients to switch things up. I like to add in some frozen peas or corn to give it a little extra flavor. You could also add some diced potatoes or even some spicy peppers if you like a little heat.

So, the next time you’re feeling down or just need a little comfort food, give homemade chicken noodle soup a try. I promise it won’t disappoint.

Oven-Baked BBQ Ribs: Tender, Tangy, and Irresistible

Hey everyone!

Today, I want to share with you one of my all-time favorite recipes: oven-baked BBQ ribs. These ribs are tender, tangy, and absolutely irresistible. Trust me, once you try these, you’ll never want to make ribs any other way.

Ingredients

BBQ ribs
Photo by pascal claivaz

  • 2 racks of baby back ribs
  • 1 cup BBQ sauce
  • 1/2 cup brown sugar
  • 1/4 cup apple cider vinegar
  • 1 tablespoon paprika
  • 1 tablespoon garlic powder
  • 1 tablespoon onion powder
  • 1 teaspoon salt
  • 1/2 teaspoon black pepper

Instructions

  1. Preheat your oven to 275°F (135°C).
  2. Remove the membrane from the back of the ribs.
  3. In a bowl, mix together the brown sugar, paprika, garlic powder, onion powder, salt, and black pepper.
  4. Rub the spice mixture all over the ribs, making sure to coat them evenly.
  5. Place the ribs on a baking sheet lined with foil.
  6. In a separate bowl, mix together the BBQ sauce and apple cider vinegar.
  7. Brush the BBQ sauce mixture over the ribs, making sure to coat them evenly.
  8. Cover the ribs with foil and bake in the oven for 3 hours.
  9. Remove the foil and bake for an additional 30 minutes.
  10. Remove the ribs from the oven and let them rest for 10 minutes.
  11. Slice the ribs and serve with your favorite sides.

That’s it! These oven-baked BBQ ribs are so easy to make and they turn out perfectly every time. The combination of the spice rub and the tangy BBQ sauce creates a flavor explosion in your mouth that will leave you craving more.

Don’t be afraid to experiment with different BBQ sauces or spice rubs to make these ribs your own. And if you’re feeling adventurous, try smoking the ribs on your grill instead of baking them in the oven.

Thanks for reading, and happy cooking!

Garlic Mashed Potatoes: Creamy and Flavorful Side Dish

Hey there, foodies! Today, I want to share with you one of my all-time favorite side dishes – Garlic Mashed Potatoes! This creamy and flavorful dish is perfect for any occasion, whether it’s a holiday dinner or a simple weeknight meal.

First things first, let’s talk about the star of the show – garlic! I absolutely love the flavor of garlic, and it pairs perfectly with mashed potatoes. To make garlic mashed potatoes, you’ll need to start by peeling and boiling your potatoes. While the potatoes are boiling, take a few cloves of garlic and mince them finely.

Once your potatoes are cooked, drain them and return them to the pot. Add in your minced garlic, some butter, milk, and salt and pepper to taste. Then, use a potato masher or an electric mixer to mash everything together until it’s smooth and creamy.

Garlic
Photo by Karolina Grabowska

The key to really great mashed potatoes is to use the right amount of liquid. You want your mashed potatoes to be creamy, but not too runny. If your mashed potatoes are too thick, add a little more milk. If they’re too thin, add more potatoes.

Another great thing about garlic mashed potatoes is that they’re incredibly versatile. You can serve them as a side dish with just about anything – roasted chicken, grilled steak, or even a hearty vegetarian stew. They’re also a great way to use up leftover potatoes.

If you’re looking for a way to jazz up your mashed potatoes, try adding some other ingredients like grated cheese, chopped herbs, or even bacon. The possibilities are endless!

In conclusion, garlic mashed potatoes are a delicious and easy-to-make side dish that everyone will love. Whether you’re serving them for a holiday dinner or a simple weeknight meal, they’re sure to be a hit. So why not give them a try tonight?

Classic Apple Pie: A Timeless Dessert for Comfort and Joy

Hey there, folks! Today, I want to talk about one of my favorite desserts of all time: classic apple pie. There’s just something about this timeless dish that brings me so much comfort and joy.

First things first, let’s talk about the crust. A good apple pie crust should be flaky and buttery, with just the right amount of sweetness. I like to make my own crust from scratch, but if you’re short on time, there are plenty of pre-made options available at your local grocery store.

Now, let’s move on to the filling. The key to a delicious apple pie filling is using the right apples. I prefer to use a mixture of Granny Smith and Honeycrisp apples for the perfect balance of tartness and sweetness. I also like to add a bit of cinnamon and nutmeg for some extra flavor.

Apple pie
Photo by Valeria Boltneva

Once your crust and filling are ready, it’s time to assemble your pie. I like to weave the crust on top for a classic look, but you can also opt for a crumb topping or even a lattice design if you’re feeling fancy.

After about an hour in the oven, your apple pie should be golden brown and smelling amazing. Serve it warm with a scoop of vanilla ice cream for the ultimate comfort food experience.

But apple pie isn’t just delicious – it’s also steeped in tradition and nostalgia. For many of us, apple pie brings back memories of childhood summers spent picking apples with our families, or cozy winter evenings spent gathered around the table with loved ones.

So, the next time you’re in need of a little comfort and joy, whip up a classic apple pie. Trust me, it’s the perfect antidote to a bad day or a stressful week.

Homemade Chicken and Dumplings: Comfort in Every Bite

Hey there! Today, I want to share with you one of my all-time favorite comfort foods – homemade chicken and dumplings. There’s just something about this dish that always makes me feel warm and cozy inside. Plus, it’s super easy to make!

Ingredients

Homemade Chicken and Dumplings
Photo by RDNE Stock project

  • 1 whole chicken (about 3-4 pounds), cut into pieces
  • 1 onion, chopped
  • 3-4 cloves garlic, minced
  • 4-5 cups chicken broth
  • 1 cup all-purpose flour
  • 1/2 cup milk
  • 1/2 teaspoon baking powder
  • 1/2 teaspoon salt
  • 1/4 teaspoon black pepper
  • 2 tablespoons butter
  • 1 tablespoon olive oil
  • 1 tablespoon fresh parsley, chopped (optional)

Instructions

  1. In a large pot or Dutch oven, heat the olive oil over medium-high heat. Add the chicken pieces and cook until browned on all sides, about 5-7 minutes.
  2. Remove the chicken from the pot and set aside. Add the onion and garlic to the pot and cook until softened, about 3-5 minutes.
  3. Add the chicken broth to the pot and bring to a boil. Reduce heat to low and return the chicken to the pot. Cover and simmer for about 1 hour, or until the chicken is cooked through and tender.
  4. While the chicken is cooking, make the dumplings. In a medium bowl, whisk together the flour, baking powder, salt, and black pepper. Cut in the butter until the mixture resembles coarse crumbs. Stir in the milk until a dough forms.
  5. Drop the dumpling dough by spoonfuls into the simmering broth. Cover and cook for 10-15 minutes, or until the dumplings are cooked through and fluffy.
  6. Remove the chicken and dumplings from the pot and serve hot, garnished with fresh parsley if desired.

And that’s it! This homemade chicken and dumplings recipe is so easy to make, but it tastes like you’ve been cooking all day. The chicken is tender and flavorful, and the dumplings are soft and pillowy. It’s the perfect meal for a chilly day or when you just need a little comfort in your life.

Do you have a favorite comfort food recipe? Let me know in the comments!

Mexican Flavors, Vegan Style: Black Bean Tacos with Avocado Lime Sauce

Hey everyone! Today I want to share with you a delicious recipe that I recently discovered. I was in the mood for some Mexican flavors, but I also wanted to keep it vegan. So, I decided to make some black bean tacos with avocado lime sauce. Let me tell you, they were amazing!

First things first, let’s talk about the black beans. I used canned black beans, but you can also cook your own from scratch. I heated them up in a pan with some onion, garlic, and chili powder. I also added a bit of salt and pepper for flavor.

For the tacos, I used soft corn tortillas. I heated them up on a dry pan until they were slightly crispy on the edges. Then, I added the black beans on top and some diced tomatoes and cilantro. You can also add some vegan cheese or sour cream if you like.

Black bean tacos
Photo by Lukas

Now, let’s talk about the star of the show: the avocado lime sauce. This sauce is so easy to make and it adds a creamy and tangy element to the tacos. All you need is one ripe avocado, the juice of one lime, some salt, and a bit of water to thin it out. I blended everything together in a food processor until it was smooth and creamy.

Once the sauce was ready, I drizzled it over the tacos and added some extra cilantro on top. And that’s it! These tacos are so flavorful and satisfying. They’re also pretty healthy, since they’re packed with protein and healthy fats.

I hope you give these black bean tacos with avocado lime sauce a try. They’re perfect for a quick and easy weeknight dinner, or for a fun taco night with friends. Let me know in the comments if you try them out!

Quick and Easy: 15-minute Vegan Pad Thai

Hey there! So, I recently stumbled upon a super quick and easy recipe for Vegan Pad Thai that I just have to share with you all. I’m not a vegan myself, but I do try to incorporate more plant-based meals into my diet for health and environmental reasons. Plus, who doesn’t love a good Pad Thai?

The best part about this recipe is that it only takes 15 minutes to make. Yep, you read that right – 15 minutes. It’s perfect for those days when you’re short on time but still want something delicious and satisfying.

Here’s what you’ll need:

Vegan
Photo by Vegan Liftz

  • 8 oz rice noodles
  • 1 red bell pepper, sliced
  • 1 cup shredded carrots
  • 1 cup bean sprouts
  • 1/2 cup chopped scallions
  • 1/2 cup chopped peanuts
  • 1/4 cup chopped cilantro
  • 1/4 cup soy sauce
  • 2 tbsp brown sugar
  • 1 tbsp sesame oil
  • 1 tbsp lime juice
  • 1 tbsp sriracha

First, cook the rice noodles according to the package instructions. While those are cooking, sauté the bell pepper and shredded carrots in a large skillet over medium heat for about 5 minutes. Then, add in the bean sprouts and scallions and cook for another 2 minutes.

In a separate bowl, whisk together the soy sauce, brown sugar, sesame oil, lime juice, and sriracha. Once the noodles are done cooking, add them to the skillet with the veggies and pour the sauce over everything. Stir everything together until everything is coated in the sauce.

Finally, top the Pad Thai with chopped peanuts and cilantro. And that’s it! You’re done. I told you it was quick and easy.

This Vegan Pad Thai is packed with flavor and nutrients. Rice noodles are gluten-free and low in fat, while the veggies and peanuts add a great crunch. Plus, the sauce is the perfect balance of sweet, salty, and spicy.

Give it a try and let me know what you think! I promise you won’t be disappointed.

Journey to Mexico: The Perfect Guacamole Recipe

Hey there fellow foodies! I recently went on a journey to Mexico and one of the highlights of my trip was trying their authentic guacamole. I have always loved guacamole but I never knew that it could taste this good! The Mexican version was so fresh, creamy, and flavorful that I couldn’t resist asking the chef for the recipe. And guess what? I got it!

So, I am going to share with you the perfect guacamole recipe that I learned during my journey to Mexico. This recipe is so easy to make that you will never have to buy store-bought guacamole again!

Ingredients:

Guacamole
Photo by Kasumi Loffler

  • 2 ripe avocados
  • 1 small tomato, diced
  • 1/4 cup red onion, diced
  • 1/4 cup cilantro leaves, chopped
  • 1 garlic clove, minced
  • 1 lime, juiced
  • Salt and pepper to taste

Instructions:

  1. Cut the avocados in half and remove the pit. Scoop out the flesh into a bowl and mash it with a fork.
  2. Add the diced tomato, red onion, cilantro leaves, and minced garlic to the bowl. Mix well.
  3. Squeeze the juice of one lime into the bowl and mix again.
  4. Add salt and pepper to taste.
  5. Refrigerate for at least 30 minutes to let the flavors meld together.
  6. Enjoy with tortilla chips or as a topping for your favorite dish!

That’s it! This guacamole recipe is so simple but the taste is out of this world. The freshness of the ingredients really shines through and the lime juice adds the perfect tangy flavor. Make sure to use ripe avocados for the best taste and texture. You can also adjust the amount of garlic, cilantro, and lime juice according to your taste preferences.

I hope you enjoyed this perfect guacamole recipe that I learned during my journey to Mexico. Try it out and let me know how it turned out for you!

Savoring Spain: A Classic Paella Recipe

Hey there foodies! Today, I want to share with you my experience of savoring Spain through a delicious classic paella recipe. Paella is one of the most iconic and traditional dishes of Spain, originally from Valencia, and it’s a must-try if you ever visit this beautiful country.

I had the pleasure of trying paella in Valencia a few years ago and it was love at first bite. The flavors, the colors, and the aroma were simply amazing. I knew I had to learn how to make it myself, and after a lot of research and practice, I finally nailed down the perfect recipe.

So, without further ado, here is my classic paella recipe:

Paella
Photo by Denys Gromov


Ingredients:
– 1 onion, chopped
– 3 garlic cloves, minced
– 2 tomatoes, chopped
– 1 red bell pepper, sliced
– 1 green bell pepper, sliced
– 1 cup of green beans, trimmed
– 1 cup of frozen peas
– 2 cups of short-grain rice
– 4 cups of chicken or vegetable broth
– 1 teaspoon of saffron threads
– 1 teaspoon of smoked paprika
– 2 lemons, cut into wedges
– Salt and pepper to taste
– Olive oil

Instructions:
1. In a large paella pan or a wide and shallow skillet, heat up some olive oil over medium heat.
2. Add the onion and garlic, and sauté until the onion is translucent.
3. Add the chopped tomatoes and cook for a few minutes until they start to break down.
4. Add the sliced bell peppers and green beans, and cook for another few minutes until they start to soften.
5. Stir in the rice, saffron, and smoked paprika, and mix well until the rice is coated in the spices.
6. Add the broth and bring it to a boil.
7. Reduce the heat to low and let it simmer for about 15 minutes, stirring occasionally.
8. Add the frozen peas and continue cooking for another 5-10 minutes until the rice is cooked and the liquid is absorbed. If the rice is still too hard, you can add more broth or water and cook for a few more minutes.
9. Turn off the heat, cover the pan with a lid or aluminum foil, and let it rest for about 10 minutes.
10. Serve hot with lemon wedges on the side and enjoy!

I hope you give this classic paella recipe a try and savor a little bit of Spain in your own home. It’s the perfect dish for a special occasion, a dinner party, or just a cozy night in. And don’t forget to pair it with a good Spanish wine or sangria for the ultimate experience. ¡Buen provecho!

From Italy with Love: Traditional Ratatouille Made Vegan

Hey there foodies! Today, I want to share with you a recipe that will make your taste buds dance with joy. It’s a traditional dish from Italy called Ratatouille, but with a vegan twist.

Before we dive into the recipe, let me give you a brief history of this dish. Ratatouille originated from the region of Provence in France. However, it has become a popular dish in Italy due to its proximity to France.

Traditionally, Ratatouille is made with eggplant, zucchini, bell peppers, onions, and tomatoes, all stewed in a rich tomato sauce. But, as a vegan, I wanted to make this dish without animal products, so I swapped out the meat for some protein-packed chickpeas.

Ratatouille
Photo by Codrin Alex


Here’s what you’ll need:

– 1 large eggplant
– 2 medium zucchinis
– 1 red bell pepper
– 1 yellow bell pepper
– 1 large onion
– 3 cloves of garlic
– 1 can of chickpeas (drained and rinsed)
– 2 cans of diced tomatoes
– 2 tablespoons of olive oil
– Salt and pepper to taste
– Fresh basil, chopped (optional)

Instructions:

1. Preheat your oven to 375°F.

2. Cut the eggplant, zucchinis, and bell peppers into bite-sized pieces.

3. Slice the onion and mince the garlic.

4. In a large, oven-safe pot or Dutch oven, heat the olive oil over medium-high heat.

5. Add the onions and garlic, and sauté for a few minutes until the onions are translucent.

6. Add the chopped vegetables and chickpeas to the pot, and stir to combine.

7. Pour in the diced tomatoes and stir again.

8. Season with salt and pepper to taste.

9. Cover the pot with a lid and transfer it to the preheated oven.

10. Bake for 45-50 minutes or until the vegetables are tender and the sauce is thickened.

11. Garnish with fresh basil, if desired.

And voila! Your traditional Ratatouille made vegan is ready to be served. This dish is perfect for any occasion, whether it’s a cozy night in or a dinner party with friends.

I hope you enjoy this recipe as much as I did. Let me know in the comments if you try it out or if you have any tips to make it even better. Bon appétit!