Classic Apple Pie Recipe with Flaky Crust

Hey there, fellow bakers! Today I want to share with you my favorite recipe for a classic apple pie with a flaky crust. This recipe has been passed down in my family for generations, and it never fails to impress.

Ingredients:

  • 1 double pie crust recipe (homemade or store-bought)
  • 6 cups thinly sliced, peeled apples (about 6 medium apples)
  • 3/4 cup granulated sugar
  • 1 tablespoon lemon juice
  • 1 teaspoon ground cinnamon
  • 1/4 teaspoon ground nutmeg
  • 1/4 teaspoon salt
  • 2 tablespoons unsalted butter, cut into small pieces
  • 1 egg, beaten

Apple Pie recipe
Photo by Asya Vlasova

Instructions:

  1. Preheat your oven to 375°F (190°C).
  2. Roll out one pie crust and place it in a 9-inch pie dish. Trim the edges with scissors or a knife.
  3. In a large bowl, toss the sliced apples with the sugar, lemon juice, cinnamon, nutmeg, and salt until well coated.
  4. Pour the apple mixture into the prepared pie crust, and dot with butter pieces.
  5. Roll out the second pie crust and place it on top of the apples. Trim the edges and crimp to seal.
  6. Cut a few slits on the top crust to allow steam to escape. Brush the beaten egg over the top crust.
  7. Bake the pie for 45-50 minutes, or until the crust is golden brown and the filling is bubbly.
  8. Let the pie cool for at least 30 minutes before slicing and serving.

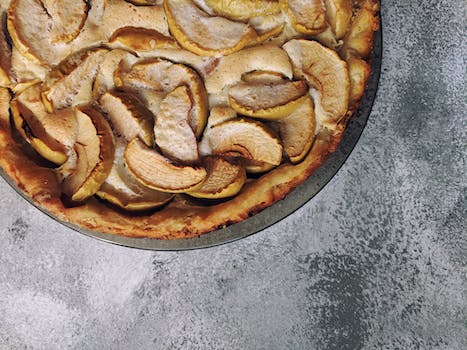
This apple pie recipe is a classic for a reason – it’s delicious! The flaky crust is the perfect compliment to the sweet and tart apple filling. I love serving this pie warm with a scoop of vanilla ice cream on top. It’s the ultimate comfort food dessert.

If you’re in the mood for a classic dessert that will please a crowd, give this apple pie recipe a try. It’s easy to make and always a hit.

Chocolate Cake Recipe with Chocolate Ganache

Hey there, fellow chocolate lovers! Today, I’m sharing with you my go-to chocolate cake recipe with chocolate ganache. This recipe is perfect for any occasion, whether it’s a birthday, anniversary, or just a Friday night treat.

Chocolate cake
Photo by Alexander Dummer

Ingredients:

  • 2 cups sugar
  • 1 3/4 cups all-purpose flour
  • 3/4 cup unsweetened cocoa powder
  • 2 teaspoons baking soda
  • 1 teaspoon baking powder
  • 1 teaspoon salt
  • 2 eggs
  • 1 cup milk
  • 1/2 cup vegetable oil
  • 2 teaspoons vanilla extract
  • 1 cup boiling water
  • 1 cup chocolate chips

Instructions:

  1. Preheat the oven to 350°F (175°C). Grease and flour two 9-inch round cake pans.
  2. In a large mixing bowl, combine the sugar, flour, cocoa powder, baking soda, baking powder, and salt. Mix well.
  3. Add the eggs, milk, oil, and vanilla extract. Beat on medium speed for 2 minutes.
  4. Stir in the boiling water. The batter will be thin, but that’s okay.
  5. Stir in the chocolate chips.
  6. Pour the batter evenly into the prepared pans.
  7. Bake for 30-35 minutes, or until a toothpick inserted in the center of the cake comes out clean.
  8. Let the cakes cool in the pans for 10 minutes before removing them from the pans and placing them on a wire rack to cool completely.

Chocolate Ganache:

To make the chocolate ganache, you’ll need:

  • 1 cup heavy cream
  • 8 ounces semi-sweet chocolate chips

Instructions:

  1. In a medium saucepan, heat the heavy cream until it just begins to boil.
  2. Remove the pan from the heat and stir in the chocolate chips until they are completely melted and the mixture is smooth.
  3. Let the ganache cool for about 10 minutes before pouring it over the cooled cake.

And that’s it! You now have a delicious chocolate cake with chocolate ganache that will satisfy any chocolate craving. Enjoy!

Carrot Cake Recipe with Cream Cheese Frosting

Hey there!

I recently baked a delicious carrot cake with cream cheese frosting and I just had to share the recipe with you. It’s perfect for any occasion, whether it’s a birthday, holiday, or just because you’re in the mood for something sweet.

Ingredients:

  • 2 cups all-purpose flour
  • 2 teaspoons baking powder
  • 1 1/2 teaspoons baking soda
  • 1 teaspoon salt
  • 2 teaspoons ground cinnamon
  • 1/2 teaspoon ground nutmeg
  • 1/2 teaspoon ground ginger
  • 4 large eggs
  • 1 1/2 cups granulated sugar
  • 1 cup vegetable oil
  • 2 teaspoons vanilla extract
  • 3 cups grated carrots
  • 1/2 cup chopped walnuts (optional)

Instructions:

  1. Preheat your oven to 350°F (180°C).
  2. Grease and flour two 9-inch cake pans.
  3. Whisk together the flour, baking powder, baking soda, salt, cinnamon, nutmeg, and ginger in a medium bowl.
  4. In a separate large bowl, beat the eggs, sugar, oil, and vanilla extract until well combined.
  5. Gradually add the dry ingredients to the wet mixture and mix until just combined.
  6. Stir in the grated carrots and chopped walnuts (if using).
  7. Pour the batter into the prepared cake pans and bake for 30-35 minutes, or until a toothpick inserted into the center comes out clean.
  8. Let the cakes cool completely before frosting.


Carrot cake
Photo by chudesabyvaut


Cream Cheese Frosting:

  • 1/2 cup unsalted butter, softened
  • 8 ounces cream cheese, softened
  • 4 cups powdered sugar
  • 1 teaspoon vanilla extract

Instructions:

  1. In a large bowl, beat the butter and cream cheese together until smooth.
  2. Add in the powdered sugar and vanilla extract and beat until well combined.
  3. Frost the cooled cake with the cream cheese frosting and enjoy!

I hope you enjoy this recipe as much as I did. It’s the perfect balance of sweetness and spice, and the cream cheese frosting is the perfect complement to the carrot cake. Let me know in the comments if you try it out!

Spicy Chicken Wings Recipe: Perfect for Game Day

Hey there, fellow foodies! Today, I want to share with you my favorite spicy chicken wings recipe that is perfect for game day. Whether you’re watching football, basketball, or any other sport, these wings will surely satisfy your cravings.

Spicy chicken wings
Photo by Angelo Greñas

Ingredients:

  • 2 lbs chicken wings
  • 1/4 cup hot sauce
  • 1/4 cup melted butter
  • 1 tsp garlic powder
  • 1 tsp onion powder
  • 1 tsp paprika
  • 1/2 tsp cayenne pepper
  • Salt and pepper to taste

Instructions:

  1. Preheat your oven to 400°F.
  2. Line a baking sheet with parchment paper and place the chicken wings on it.
  3. In a small bowl, mix together the hot sauce, melted butter, garlic powder, onion powder, paprika, cayenne pepper, salt, and pepper.
  4. Brush the mixture over the chicken wings, making sure to coat them evenly.
  5. Bake the wings for 35-40 minutes, or until they are crispy and golden brown.
  6. Remove the wings from the oven and let them cool for a few minutes before serving.
  7. Garnish with chopped parsley or cilantro, if desired.

And that’s it! This recipe is super easy to make and the result is deliciously spicy chicken wings that will surely impress your guests. You can also adjust the amount of cayenne pepper to make it less spicy or more depending on your preference.

So, what are you waiting for? Try this recipe out and let me know how it turns out for you. And don’t forget to enjoy it with your favorite dipping sauce and a cold beer. Cheers!

Homemade Salsa Recipe: Fresh and Flavorful

Hey there, salsa lovers! One of my favorite things to make in the kitchen is homemade salsa. It’s so easy to make, and the flavor is so much better than store-bought salsa. Plus, you can customize it to your liking by adjusting the spice level or adding in your favorite ingredients.

Here’s my go-to recipe for fresh and flavorful homemade salsa:

Ingredients:

Salsa
Photo by Pixabay

  • 4-5 ripe tomatoes
  • 1/2 red onion
  • 1 jalapeño pepper
  • 1/4 cup fresh cilantro
  • 1 lime, juiced
  • 1 tsp salt
  • 1 tsp sugar

Instructions:

  1. Remove the stems from the tomatoes and chop them into small pieces.
  2. Finely chop the red onion.
  3. Remove the stem and seeds from the jalapeño pepper and finely chop.
  4. Chop the cilantro.
  5. Combine all of the ingredients in a bowl and mix well.
  6. Let the salsa sit for at least 30 minutes to allow the flavors to meld together.
  7. Give the salsa a taste and adjust the seasoning as needed.

That’s it! This salsa is perfect for dipping tortilla chips, topping tacos or grilled meats, or even as a salad dressing. And the best part is, you can adjust the spice level to your liking. If you like it really spicy, add in another jalapeño or even a serrano pepper. If you prefer a milder salsa, remove the seeds from the jalapeño or omit it altogether.

I hope you give this homemade salsa recipe a try! Let me know in the comments if you have any other favorite salsa ingredients or variations.

Homemade Pico de Gallo Recipe

Hey guys! I wanted to share with you my go-to recipe for homemade pico de gallo. It’s super easy to make and tastes amazing!

Ingredients:

  • 4-5 medium sized tomatoes
  • 1/2 red onion
  • homemade
    Photo by Pixabay

  • 1 jalapeno pepper (seeds removed)
  • 1/4 cup chopped cilantro
  • 1 tablespoon lime juice
  • 1/2 teaspoon salt

Instructions:

  1. Chop up your tomatoes into small pieces and place them in a large mixing bowl.
  2. Finely chop your red onion and jalapeno pepper and add them to the mixing bowl.
  3. Add in your chopped cilantro, lime juice, and salt.
  4. Mix everything together until it’s well combined.
  5. Cover the mixing bowl with plastic wrap and place it in the refrigerator for at least an hour to let the flavors meld together.
  6. Take it out of the fridge and give it a good stir before serving.

That’s it! This homemade pico de gallo is perfect for topping tacos, burritos, or just eating with chips. It’s also a great way to use up any extra tomatoes or cilantro you have lying around. Enjoy!

Homemade Onion Rings Recipe

Hey there, fellow foodies! Today, I want to share with you my homemade onion rings recipe. I have been making these for years now and they never fail to impress my family and friends. So, grab your apron and let’s get cooking!

Ingredients:

  • 2 large onions
  • Onion rings
    Photo by Pixabay

  • 1 cup all-purpose flour
  • 1 tsp baking powder
  • 1 tsp salt
  • 1 tsp paprika
  • 1 egg
  • 1 cup milk
  • 1 cup breadcrumbs
  • Vegetable oil (for frying)

Instructions:

  1. Peel and slice the onions into rings. Separate the rings and set them aside.
  2. In a bowl, mix the flour, baking powder, salt, and paprika.
  3. In another bowl, beat the egg and mix in the milk.
  4. Dip the onion rings into the flour mixture, then into the egg mixture, and finally into the breadcrumbs.
  5. Heat the vegetable oil in a large pan over medium-high heat.
  6. Once the oil is hot, carefully place the onion rings in the pan. Fry for 2-3 minutes on each side or until golden brown.
  7. Remove the onion rings from the pan and place them on a paper towel to absorb excess oil.
  8. Serve hot with your favorite dipping sauce.

And there you have it – a delicious and easy homemade onion rings recipe that will surely impress your guests. You can also customize this recipe by adding your favorite spices or herbs to the flour mixture. I hope you enjoy making and eating these onion rings as much as I do!

Garlic Butter Shrimp Recipe: A Quick and Tasty Appetizer

Hey there foodies! Today I want to share with you one of my favorite appetizer recipes, Garlic Butter Shrimp. This dish is not only quick and easy to make, but also absolutely delicious. It’s perfect for any occasion, whether you’re having friends over for a dinner party or just looking for a tasty snack.

Ingredients:

  • 1 pound large shrimp, peeled and deveined
  • 4 tablespoons unsalted butter
  • Garlic Butter Shrimp
    Photo by Malidate Van

  • 4 cloves garlic, minced
  • 1/4 teaspoon red pepper flakes
  • 1/4 teaspoon salt
  • 1/4 teaspoon black pepper
  • 1 tablespoon fresh parsley, chopped
  • 1 tablespoon lemon juice

Directions:

  1. In a large skillet, melt the butter over medium-high heat.
  2. Add the garlic and red pepper flakes, and sauté for 1-2 minutes until fragrant.
  3. Add the shrimp to the skillet and season with salt and black pepper. Cook for 2-3 minutes on each side until pink and cooked through.
  4. Sprinkle chopped parsley and lemon juice over the shrimp and stir to combine.
  5. Transfer the shrimp to a serving dish and pour the garlic butter sauce over it.
  6. Enjoy your mouth-watering Garlic Butter Shrimp!

This recipe is super versatile, and you can easily adjust the flavors to your liking. If you prefer your shrimp a bit spicier, you can add more red pepper flakes or even some cayenne pepper. You can also experiment with different herbs and spices, such as thyme, rosemary, or paprika.

Garlic Butter Shrimp is not only a tasty appetizer, but also a healthy one. Shrimp is a low-calorie, high-protein food that is rich in nutrients such as vitamin D, vitamin B12, and omega-3 fatty acids. Adding some veggies like asparagus or zucchini to the skillet can make this dish even more nutritious.

So go ahead and give this recipe a try, and let me know in the comments how it turned out for you. And if you have any other tasty shrimp recipes, feel free to share them with us!

Easy Homemade Hummus Recipe

Hey there! Today, I’m excited to share with you my easy homemade hummus recipe.

First of all, let me just say that I’m a HUGE fan of hummus. It’s a tasty and healthy snack that’s perfect for any time of day. I used to buy hummus from the store, but then I realized that making it at home is actually super easy and way more cost-effective.

Here’s what you’ll need:

hummus
Photo by Naim Benjelloun

  • 1 can of chickpeas (15 oz)
  • 2 cloves of garlic
  • 3 tablespoons of tahini
  • 2 tablespoons of lemon juice
  • 1/4 cup of olive oil
  • 1/2 teaspoon of salt
  • 1/4 teaspoon of cumin
  • Water (as needed)

Instructions:

  1. Drain and rinse the chickpeas.
  2. In a food processor, blend the chickpeas, garlic, tahini, lemon juice, olive oil, salt, and cumin until smooth.
  3. If the hummus is too thick, add water (1 tablespoon at a time) until it reaches your desired consistency.
  4. Transfer the hummus to a serving bowl and drizzle with olive oil.
  5. Enjoy with pita bread, crackers, vegetables, or whatever you like!

That’s it! See, I told you it was easy. Plus, you can customize the recipe to your liking by adding herbs, spices, or roasted vegetables.

I hope you give this recipe a try and let me know how it turns out for you. Happy snacking!

Classic Guacamole Recipe

Hey guys, who doesn’t love guacamole? It’s the perfect dip for any occasion. Whether you’re having a party or just snacking on your own, guacamole always hits the spot. Today, I want to share with you my go-to recipe for classic guacamole. It’s simple, delicious, and always a crowd-pleaser.

Ingredients:

  • 3 ripe avocados
  • Guacamole
    Photo by Kasumi Loffler

  • 1 lime
  • 1/2 teaspoon salt
  • 1/2 teaspoon cumin
  • 1/2 teaspoon garlic powder
  • 1/2 teaspoon onion powder
  • 1/4 teaspoon cayenne pepper
  • 2 tablespoons chopped cilantro
  • 1 small diced tomato
  • 1/4 cup diced red onion

Instructions:

  1. Cut the avocados in half and remove the pit. Scoop out the flesh into a bowl.
  2. Squeeze the lime over the avocado and sprinkle with salt, cumin, garlic powder, onion powder, and cayenne pepper.
  3. Mash the avocado with a fork until it reaches your desired consistency.
  4. Add the chopped cilantro, diced tomato, and diced red onion. Mix together.
  5. Taste and adjust seasoning if necessary. Serve immediately or cover and refrigerate until ready to serve.

See, I told you it was simple! The key to this recipe is using ripe avocados and fresh ingredients. Don’t be afraid to adjust the seasoning to your taste. I like mine a little spicier, so I usually add a little extra cayenne pepper.

One tip for keeping your guacamole looking fresh is to press plastic wrap directly onto the surface of the dip before refrigerating. This will prevent it from turning brown.

I hope you enjoy this classic guacamole recipe as much as I do! Let me know in the comments if you have any other favorite guacamole ingredients or tips.