How to Create a Colorful Vegan Buddha Bowl for a Nutritious Meal

Hey there! Today I want to share with you one of my favorite recipes for a colorful and nutritious meal – a Vegan Buddha Bowl. If you’re looking for a dish that’s not only delicious but also packed with vitamins, minerals, and all the good stuff, you’ve come to the right place! Let’s get started.

Gather your ingredients

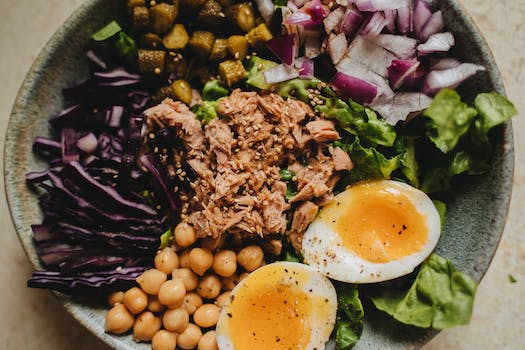
The first step in creating a fabulous Buddha Bowl is to gather all the ingredients. The great thing about this dish is that you can customize it to your liking, so feel free to get creative! Here’s a list of some common ingredients you can include:

Vegan Buddha Bowl
Photo by Alesia Kozik

  • Grains: quinoa, brown rice, or couscous
  • Protein: chickpeas, tofu, or tempeh
  • Veggies: kale, spinach, carrots, bell peppers, and any other colorful veggies you love
  • Healthy fats: avocado, nuts, or seeds
  • Sauces or dressings: tahini, peanut sauce, or a simple lemon vinaigrette

Cook your grains and protein

Once you have all your ingredients ready, it’s time to start cooking! Begin by preparing your grains according to the package instructions. While the grains are cooking, you can also start cooking your protein. If you’re using tofu or tempeh, lightly sauté them in a pan with some olive oil until they’re golden brown and crispy. If you prefer chickpeas, you can roast them in the oven with a drizzle of olive oil, salt, and your favorite spices.

Assemble your vibrant bowl

Now comes the fun part – assembling your colorful bowl! Start by adding a generous portion of your cooked grains as the base. Then, arrange your cooked protein, veggies, and healthy fats on top. Don’t be afraid to play with colors and textures here! Add some crunch with chopped bell peppers, a pop of green with fresh spinach leaves, and creaminess with sliced avocado. The more variety, the better!

Drizzle on your favorite dressing

No Buddha Bowl is complete without a delicious dressing to tie everything together. You can either use a store-bought dressing or make your own. One of my go-to dressings is a simple mix of tahini, lemon juice, garlic, and a touch of maple syrup for sweetness. Alternatively, a zesty peanut sauce or a tangy lemon vinaigrette can also work wonders. Drizzle the dressing over your bowl, and you’re ready to dig in!

And there you have it – a colorful Vegan Buddha Bowl that not only looks stunning but also nourishes your body with all the essential nutrients. Feel free to get creative and experiment with different ingredients to find your perfect combination. Trust me, once you try this wholesome meal, you’ll be hooked!

Until next time, happy cooking!

Hearty Beef Stew: A Warm and Satisfying Classic

Hey there, foodies! Today, I’m going to talk about one of my all-time favorite winter dishes: hearty beef stew. There’s nothing quite like a warm bowl of stew on a chilly day, and this classic recipe never fails to hit the spot.

The Ingredients

Before we get started, let’s talk about what you’ll need to make this delicious stew:

Beef stew
Photo by SenuScape

  • 2 pounds of beef chuck, cut into 1-inch pieces
  • 3 tablespoons of olive oil
  • 1 large onion, diced
  • 4 cloves of garlic, minced
  • 3 large carrots, peeled and sliced into 1/4-inch rounds
  • 3 stalks of celery, sliced into 1/4-inch pieces
  • 2 tablespoons of tomato paste
  • 1 cup of red wine
  • 4 cups of beef broth
  • 1 bay leaf
  • 1 teaspoon of dried thyme
  • 1 pound of potatoes, peeled and cut into 1-inch pieces
  • Salt and pepper to taste

The Steps

Now that we have our ingredients, let’s get cooking:

  1. Heat the olive oil in a large pot over medium-high heat.
  2. Add the beef and cook until browned on all sides, about 5-7 minutes.
  3. Remove the beef from the pot and set it aside.
  4. Add the onion, garlic, carrots, and celery to the pot and cook until the vegetables are softened, about 5-7 minutes.
  5. Add the tomato paste and cook for another 1-2 minutes.
  6. Return the beef to the pot and add the red wine, beef broth, bay leaf, and thyme. Bring the mixture to a boil, then reduce the heat and simmer for 1 hour.
  7. Add the potatoes to the pot and continue simmering until the potatoes are tender and the meat is cooked through, about 30-45 minutes.
  8. Remove the bay leaf and season with salt and pepper to taste.

The Result

And that’s it! You now have a delicious pot of hearty beef stew ready to be enjoyed. This recipe is perfect for a cozy night in or for feeding a crowd. Serve it with some crusty bread or over a bed of rice for a complete meal. Trust me, you won’t be disappointed.

So next time you’re in the mood for something warm and satisfying, give this classic dish a try. Your taste buds will thank you!

Creamy Tomato Soup: A Cozy Bowl of Comfort

There’s nothing quite like a warm bowl of creamy tomato soup on a chilly day. It’s like a big, cozy hug in a bowl. This classic comfort food is beloved by many, and for good reason. It’s simple, delicious, and oh-so-satisfying.

I love making creamy tomato soup from scratch. It’s surprisingly easy and so much tastier than the canned stuff. Plus, you can customize it to your liking. Want it extra creamy? Add more cream. Want it spicy? Add some red pepper flakes. The possibilities are endless.

Here’s my go-to recipe for creamy tomato soup:

Creamy tomato soup
Photo by cottonbro studio

Ingredients:

  • 1 tablespoon olive oil
  • 1 onion, chopped
  • 2 cloves garlic, minced
  • 2 cans of whole peeled tomatoes
  • 2 cups chicken or vegetable broth
  • 1/2 cup heavy cream
  • Salt and pepper, to taste

Instructions:

  1. Heat the olive oil in a large pot over medium heat. Add the onion and garlic and cook until softened, about 5 minutes.
  2. Add the canned tomatoes and their juices to the pot. Use a wooden spoon to break up the tomatoes into smaller pieces.
  3. Pour in the broth and bring the soup to a simmer. Cook for about 20 minutes.
  4. Remove the soup from the heat and let it cool slightly. Use an immersion blender (or transfer the soup to a blender) to puree the soup until smooth.
  5. Stir in the heavy cream and season with salt and pepper to taste.
  6. Serve hot with some crusty bread for dipping.

See? It’s so easy! And the result is a rich, velvety soup that will warm you up from the inside out. Plus, it’s packed with vitamins and antioxidants from the tomatoes.

So next time you’re in need of some comfort food, try making a batch of creamy tomato soup. It’s the perfect way to cozy up on a chilly day.

Homemade Chicken Noodle Soup: A Soul-Soothing Bowl

Hey there, foodies! Today I want to talk about one of my favorite comfort foods – homemade chicken noodle soup. There’s nothing quite like a warm bowl of soup on a chilly day, and chicken noodle soup has always been my go-to. Not only is it delicious, but it’s also easy to make and incredibly soothing for the soul.

First things first, let’s talk about the ingredients. You’ll need:

  • 1 whole chicken
  • Chicken noodle soup
    Photo by Nguyen Phuong NGUYEN

  • 1 onion, chopped
  • 3 carrots, peeled and chopped
  • 3 stalks of celery, chopped
  • 2 cloves of garlic, minced
  • 8 cups of chicken broth
  • 1 bay leaf
  • 1 tablespoon of fresh thyme leaves
  • Salt and pepper to taste
  • 8 oz of egg noodles

Start by cooking the chicken in a large pot of water until it’s fully cooked. Remove the chicken from the pot and let it cool. Once it’s cool enough to handle, remove the meat from the bones and set it aside. Discard the bones and skin.

In the same pot, sauté the onion, carrots, celery, and garlic until they’re softened. Add the chicken broth, bay leaf, thyme, salt, and pepper. Bring it to a boil, then reduce the heat and let it simmer for about 20 minutes.

Add the egg noodles to the pot and cook until they’re tender. Add the chicken back in and cook for another 5-10 minutes until everything is heated through.

And that’s it! Homemade chicken noodle soup in just a few simple steps. Not only is it delicious, but it’s also incredibly comforting. There’s something about a warm bowl of soup that just makes everything better.

If you’re feeling adventurous, you can also add in some other ingredients to switch things up. I like to add in some frozen peas or corn to give it a little extra flavor. You could also add some diced potatoes or even some spicy peppers if you like a little heat.

So, the next time you’re feeling down or just need a little comfort food, give homemade chicken noodle soup a try. I promise it won’t disappoint.

Oven-Baked BBQ Ribs: Tender, Tangy, and Irresistible

Hey everyone!

Today, I want to share with you one of my all-time favorite recipes: oven-baked BBQ ribs. These ribs are tender, tangy, and absolutely irresistible. Trust me, once you try these, you’ll never want to make ribs any other way.

Ingredients

BBQ ribs
Photo by pascal claivaz

  • 2 racks of baby back ribs
  • 1 cup BBQ sauce
  • 1/2 cup brown sugar
  • 1/4 cup apple cider vinegar
  • 1 tablespoon paprika
  • 1 tablespoon garlic powder
  • 1 tablespoon onion powder
  • 1 teaspoon salt
  • 1/2 teaspoon black pepper

Instructions

  1. Preheat your oven to 275°F (135°C).
  2. Remove the membrane from the back of the ribs.
  3. In a bowl, mix together the brown sugar, paprika, garlic powder, onion powder, salt, and black pepper.
  4. Rub the spice mixture all over the ribs, making sure to coat them evenly.
  5. Place the ribs on a baking sheet lined with foil.
  6. In a separate bowl, mix together the BBQ sauce and apple cider vinegar.
  7. Brush the BBQ sauce mixture over the ribs, making sure to coat them evenly.
  8. Cover the ribs with foil and bake in the oven for 3 hours.
  9. Remove the foil and bake for an additional 30 minutes.
  10. Remove the ribs from the oven and let them rest for 10 minutes.
  11. Slice the ribs and serve with your favorite sides.

That’s it! These oven-baked BBQ ribs are so easy to make and they turn out perfectly every time. The combination of the spice rub and the tangy BBQ sauce creates a flavor explosion in your mouth that will leave you craving more.

Don’t be afraid to experiment with different BBQ sauces or spice rubs to make these ribs your own. And if you’re feeling adventurous, try smoking the ribs on your grill instead of baking them in the oven.

Thanks for reading, and happy cooking!

Savoring Spain: A Classic Paella Recipe

Hey there foodies! Today, I want to share with you my experience of savoring Spain through a delicious classic paella recipe. Paella is one of the most iconic and traditional dishes of Spain, originally from Valencia, and it’s a must-try if you ever visit this beautiful country.

I had the pleasure of trying paella in Valencia a few years ago and it was love at first bite. The flavors, the colors, and the aroma were simply amazing. I knew I had to learn how to make it myself, and after a lot of research and practice, I finally nailed down the perfect recipe.

So, without further ado, here is my classic paella recipe:

Paella
Photo by Denys Gromov


Ingredients:
– 1 onion, chopped
– 3 garlic cloves, minced
– 2 tomatoes, chopped
– 1 red bell pepper, sliced
– 1 green bell pepper, sliced
– 1 cup of green beans, trimmed
– 1 cup of frozen peas
– 2 cups of short-grain rice
– 4 cups of chicken or vegetable broth
– 1 teaspoon of saffron threads
– 1 teaspoon of smoked paprika
– 2 lemons, cut into wedges
– Salt and pepper to taste
– Olive oil

Instructions:
1. In a large paella pan or a wide and shallow skillet, heat up some olive oil over medium heat.
2. Add the onion and garlic, and sauté until the onion is translucent.
3. Add the chopped tomatoes and cook for a few minutes until they start to break down.
4. Add the sliced bell peppers and green beans, and cook for another few minutes until they start to soften.
5. Stir in the rice, saffron, and smoked paprika, and mix well until the rice is coated in the spices.
6. Add the broth and bring it to a boil.
7. Reduce the heat to low and let it simmer for about 15 minutes, stirring occasionally.
8. Add the frozen peas and continue cooking for another 5-10 minutes until the rice is cooked and the liquid is absorbed. If the rice is still too hard, you can add more broth or water and cook for a few more minutes.
9. Turn off the heat, cover the pan with a lid or aluminum foil, and let it rest for about 10 minutes.
10. Serve hot with lemon wedges on the side and enjoy!

I hope you give this classic paella recipe a try and savor a little bit of Spain in your own home. It’s the perfect dish for a special occasion, a dinner party, or just a cozy night in. And don’t forget to pair it with a good Spanish wine or sangria for the ultimate experience. ¡Buen provecho!

Savoring Italy: Authentic Homemade Lasagna Recipe

Hi there, fellow foodies! Today, I’m excited to share with you my authentic homemade lasagna recipe that will transport you straight to Italy. Lasagna is a classic Italian dish that has been enjoyed for centuries, and for good reason – it’s delicious!

Before we dive into the recipe, let’s talk about what makes an authentic Italian lasagna. First and foremost, it’s all about the ingredients. Traditional lasagna is made with fresh pasta sheets, homemade tomato sauce, and a variety of cheeses, including ricotta, mozzarella, and parmesan. It’s also important to layer the ingredients properly – you want each bite to have a perfect balance of pasta, sauce, and cheese.

Now, let’s get started with the recipe!

Lasagna recipe
Photo by Marta Dzedyshko

Ingredients:

  • 1 pound of fresh lasagna sheets (homemade or store-bought)
  • 1 pound of ground beef
  • 1 onion, chopped
  • 3 cloves of garlic, minced
  • 1 jar of homemade tomato sauce (or store-bought if you’re short on time)
  • 1 cup of ricotta cheese
  • 1 cup of shredded mozzarella cheese
  • 1 cup of grated parmesan cheese
  • Salt and pepper to taste

Directions:

  1. Preheat your oven to 375°F.
  2. In a large skillet, brown the ground beef over medium heat. Once it’s cooked through, remove it from the skillet and set it aside.
  3. Add the chopped onion and minced garlic to the skillet and cook until the onion is translucent.
  4. Add the ground beef back to the skillet and stir in the tomato sauce. Simmer for 10-15 minutes.
  5. In a separate bowl, mix together the ricotta, mozzarella, and parmesan cheeses.
  6. Now it’s time to layer the lasagna! Start with a layer of tomato sauce on the bottom of a 9×13 inch baking dish. Add a layer of fresh lasagna sheets, followed by a layer of the cheese mixture. Repeat this process until you’ve used up all of your ingredients, ending with a layer of cheese on top.
  7. Cover the baking dish with foil and bake for 25 minutes. Remove the foil and bake for an additional 15-20 minutes, or until the cheese is golden brown and bubbly.
  8. Let the lasagna rest for 10-15 minutes before serving.
  9. Enjoy!

And there you have it – a delicious, authentic homemade lasagna that will transport you straight to Italy. Serve it with a crusty loaf of bread and a glass of red wine for the ultimate Italian feast. Buon appetito!

Experience the Middle East: A Simple Falafel Recipe

Hello there! Are you ready to experience a taste of the Middle East? If you’re looking for a simple and delicious recipe to try at home, look no further than falafel. This vegetarian dish is packed with flavor and is a staple in Middle Eastern cuisine. Here’s my recipe:

Ingredients:

  • 1 can of chickpeas
  • 1/2 onion, chopped
  • Middle Eastern cuisine
    Photo by Nataliya Vaitkevich

  • 1/4 cup chopped fresh parsley
  • 1/4 cup chopped fresh cilantro
  • 2 cloves of garlic, minced
  • 1 tsp. cumin
  • 1 tsp. coriander
  • 1/4 tsp. cayenne pepper
  • 1 tsp. salt
  • 1/2 tsp. baking powder
  • 1/2 cup flour
  • Oil for frying

Instructions:

  1. Drain and rinse the chickpeas. Pat them dry with a paper towel.
  2. In a food processor, combine the chickpeas, onion, parsley, cilantro, garlic, cumin, coriander, cayenne pepper, salt, and baking powder. Pulse until everything is finely chopped but not pureed.
  3. Transfer the mixture to a bowl and stir in the flour. The mixture should be thick enough to form balls. If it’s too wet, add a little more flour.
  4. Heat about 1 inch of oil in a deep frying pan over medium-high heat.
  5. Form the mixture into small balls, about 1 1/2 inches in diameter. Flatten them slightly with your palm.
  6. Carefully drop the falafel balls into the hot oil and fry until they’re golden brown and crispy on the outside, about 3-4 minutes per side.
  7. Remove the falafel from the oil with a slotted spoon and place them on a paper towel to drain off any excess oil.
  8. Serve the falafel hot with pita bread, hummus, and tzatziki sauce.

That’s it! Falafel is a simple and delicious dish that’s perfect for a quick and easy meal. It’s also great for entertaining guests or bringing to a potluck. If you’ve never tried falafel before, I highly recommend giving this recipe a try. You won’t be disappointed!

A Taste of India: Step-by-Step Guide to Chicken Tikka Masala

Hey there foodies! Today, I’m sharing my favorite recipe for a classic Indian dish – Chicken Tikka Masala. This delicious and creamy dish is perfect for a cozy night in or to impress your guests at a dinner party. Follow along with my step-by-step guide and I promise you won’t be disappointed.

Ingredients:

– 1 lb boneless, skinless chicken breast, cut into bite-sized pieces
– 1 cup plain Greek yogurt

Chicken Tikka Masala
Photo by Pixie Pannier


– 2 tbsp lemon juice
– 2 tsp ground cumin
– 2 tsp paprika
– 1 tsp ground cinnamon
– 1 tsp salt
– 1 tsp freshly ground black pepper
– 2 tbsp unsalted butter
– 1 large onion, diced
– 4 garlic cloves, minced
– 2 tbsp grated fresh ginger
– 2 tsp ground coriander
– 1 tsp ground cumin
– 1 tsp paprika
– 1 tsp garam masala
– 1 can (14.5 oz) crushed tomatoes
– 1 cup heavy cream
– Fresh cilantro, chopped, for garnish
– Cooked basmati rice, for serving

Instructions:

1. In a large bowl, combine the chicken, yogurt, lemon juice, cumin, paprika, cinnamon, salt, and pepper. Mix well and allow to marinate in the fridge for at least 30 minutes, or up to 12 hours.

2. Preheat a grill or grill pan to high heat. Thread the chicken onto skewers and grill for 5-7 minutes per side, or until cooked through. Remove from the grill and set aside.

3. In a large skillet, melt the butter over medium heat. Add the onion and cook until softened, about 5 minutes. Add the garlic and ginger and cook for another 2 minutes. Add the coriander, cumin, paprika, and garam masala and cook for 1-2 minutes, until fragrant.

4. Add the crushed tomatoes and bring the mixture to a simmer. Cook for 10-15 minutes, until the sauce has thickened slightly.

5. Add the grilled chicken to the skillet and stir to coat in the sauce. Add the heavy cream and stir to combine. Simmer for another 5 minutes, until the sauce has thickened and the chicken is heated through.

6. Serve the chicken tikka masala over cooked basmati rice and garnish with fresh cilantro.

There you have it – a delicious and authentic recipe for chicken tikka masala. It may take a little bit of effort, but trust me, it’s totally worth it. Happy cooking!

Lemon Bars Recipe: Tart and Sweet

Hey there, fellow foodies! Today, I’m going to share with you my favorite recipe for lemon bars. These bars are the perfect combination of tart and sweet, and they make for a delicious dessert or snack.

Ingredients

  • 1 cup all-purpose flour
  • 1/2 cup unsalted butter, softened
  • 1/4 cup powdered sugar
  • 2 eggs
  • 1 cup granulated sugar
  • 1/4 cup fresh lemon juice
  • 1/2 teaspoon baking powder
  • 1/4 teaspoon salt
  • Additional powdered sugar for dusting

Lemon bars
Photo by Canto Photography

Instructions

  1. Preheat your oven to 350°F (175°C).
  2. In a medium bowl, mix together the flour, butter, and powdered sugar until a dough forms.
  3. Press the dough into an 8-inch square baking pan and bake for 15-20 minutes, or until lightly golden brown.
  4. While the crust is baking, whisk together the eggs, granulated sugar, lemon juice, baking powder, and salt until well combined.
  5. Pour the mixture over the hot crust and bake for an additional 20-25 minutes, or until the filling is set and lightly golden around the edges.
  6. Let the bars cool completely before dusting with powdered sugar and slicing into squares.
  7. Enjoy!

These lemon bars are so easy to make and they always turn out perfectly. I love how the tangy lemon flavor balances out the sweetness of the sugar. They’re a great dessert option for any occasion, whether you’re hosting a dinner party or just want a sweet treat after dinner.

If you’re a fan of lemon desserts like me, then you definitely need to give these lemon bars a try. I promise you won’t be disappointed!

This post may contain affiliate links, where I may receive a small commission if you purchase something through following the link at no cost to you.